
Ever wonder how some property photos look so crisp and perfectly lit, from the darkest corner of the basement to the brightest sunlit window? The secret is often HDR photography.
It's a technique that blends multiple photos of the same room—taken at different exposures—into one single, stunning image. Think of it as combining a dark, a bright, and a perfectly balanced shot to capture everything the human eye sees. The result? Every detail is crystal clear, creating visuals that feel vibrant and true to life.
Why HDR Makes Your Listings Impossible to Ignore

In today's market, the first showing happens online. A buyer's journey starts with a scroll, and your listing photos are your one shot to stop them in their tracks. This is where HDR photography for real estate becomes your most valuable asset.
Picture this: you're shooting a gorgeous living room with a huge window overlooking a manicured garden. A standard camera has to make a tough choice. Expose for the interior, and that beautiful view becomes a blown-out white mess. Expose for the garden, and the living room is suddenly a dark, gloomy cave.
Neither of those options does the home justice.
High Dynamic Range (HDR) photography solves this problem beautifully. By taking a "bracket" of photos at different light levels, it captures all the visual information in the scene. When these shots are merged, you get a single, cohesive photo that looks natural and inviting, just as if you were standing there.
The Real-World Impact on Buyer Engagement
The final image is more than just technically sound—it creates an emotional connection. Buyers can see the rich grain in the hardwood floors, the texture of the sofa, and the vibrant green of the lawn outside, all in a single glance. This complete picture helps them truly imagine themselves in the space.
And that connection delivers real, measurable results.
Industry data shows that listings with HDR photos get a massive 118% increase in online views. On top of that, properties showcased with professional HDR photography tend to sell up to 50% faster. Buyers are just naturally drawn to images that feel both realistic and aspirational.
The magic of HDR isn't just about better lighting. It's about building trust and desire from the very first click. A clear, balanced photo signals professionalism and shows the property at its absolute best, sparking genuine interest before a buyer ever steps through the door.
To give you a clearer picture, here's how HDR photography stacks up against standard shots when it comes to listing performance.
HDR vs Standard Photography Impact on Listings
As you can see, the choice to use HDR photography directly influences key business metrics, from initial engagement to the final sale price.
From Clicks to Closings
At the end of the day, using HDR photography for real estate is a smart business move. It directly impacts how many buyers click on your listing and how they perceive the property's value. The importance of visuals is a cornerstone of modern marketing, and understanding why you need high-quality media for digital advertising can put the value of HDR into a broader context.
Better images lead to more showings. More showings lead to more offers. It’s a simple formula for turning an average online listing into a property everyone wants to see.
Getting Your Gear and Camera Settings Right
You don't need a Hollywood-level budget to produce professional, high-quality images for your listings. Success in HDR photography for real estate is less about having the most expensive equipment and more about using the right gear correctly.
With just a few key pieces and a repeatable settings workflow, you can consistently capture the bracketed shots needed for a stunning final image. The good news? Most modern DSLR and mirrorless cameras are more than capable of handling the job.
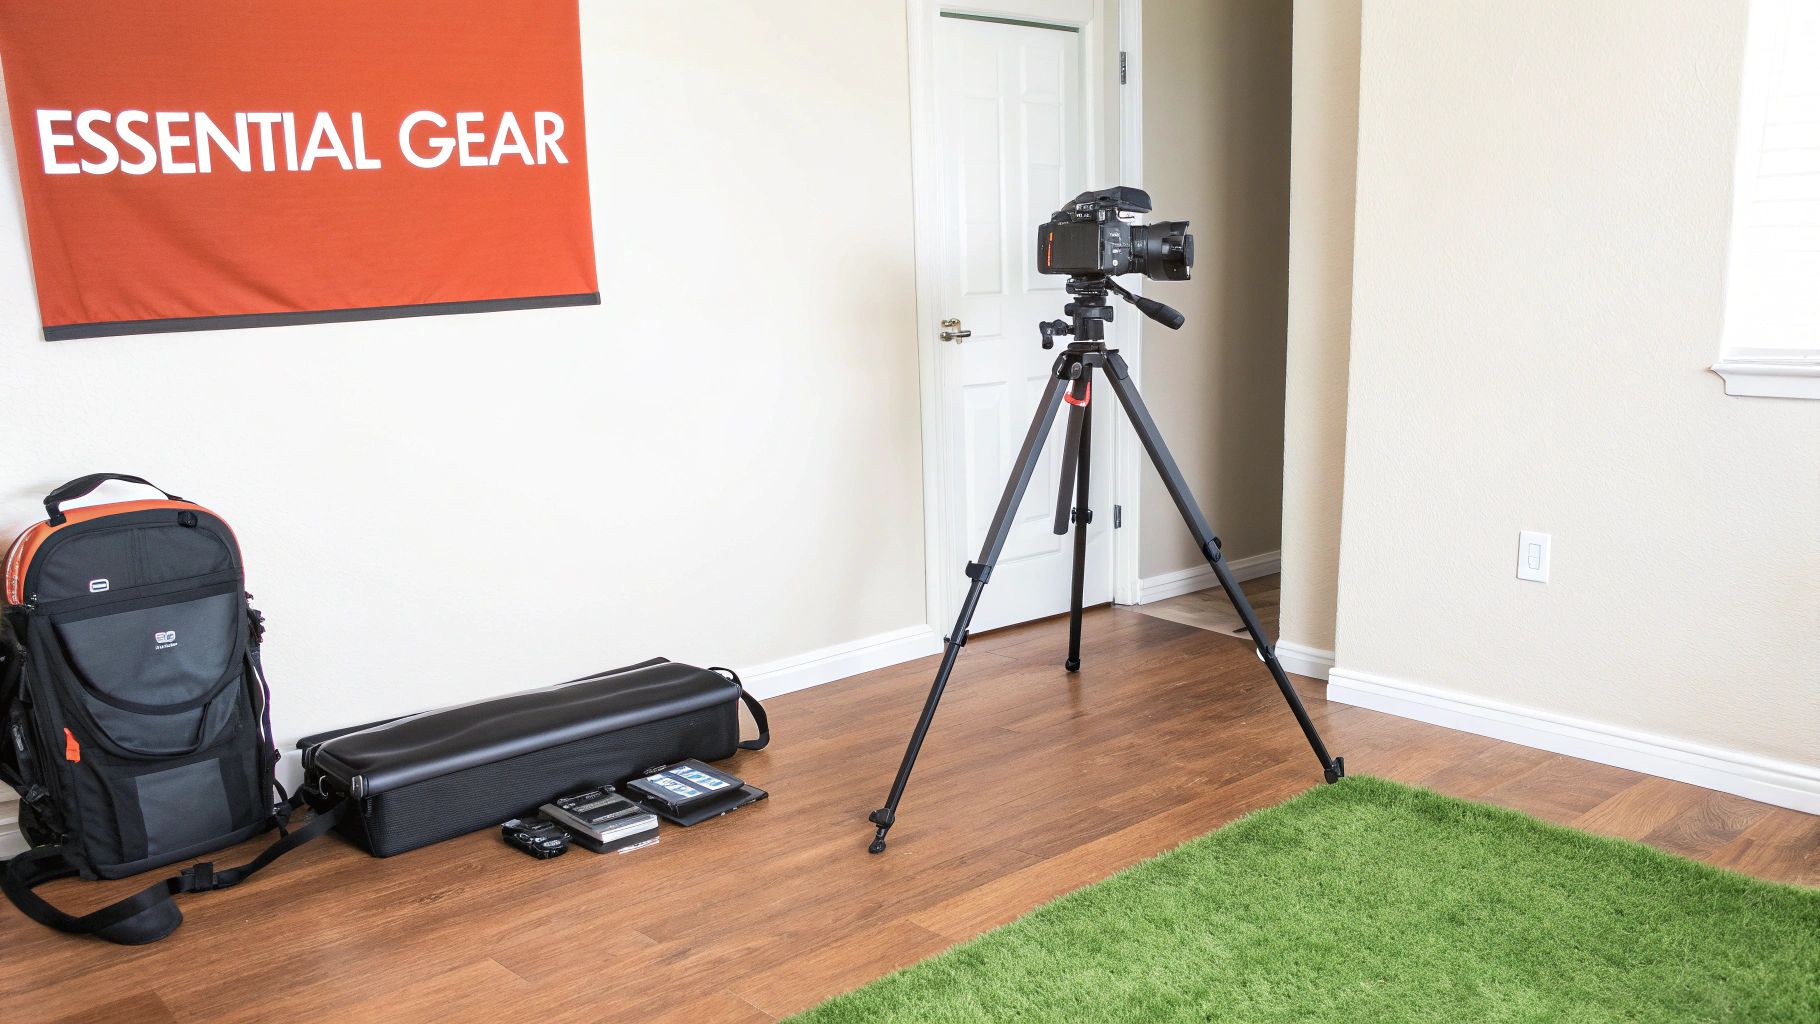
The Essential Gear You Actually Need
Before we even touch the camera, let's talk about the single most important piece of gear for HDR photography: a sturdy tripod.
Because HDR works by blending multiple photos, each frame must be perfectly aligned. Any movement, even a tiny vibration, will result in blurry, misaligned images that are impossible to merge cleanly. A solid tripod eliminates this risk. This is not the place to cut corners; a flimsy tripod will only lead to frustration and unusable photos.
Beyond the tripod, your camera just needs two key functions:
- Full Manual Mode (M): This gives you complete control over the exposure settings, which is essential for consistency.
- Auto Exposure Bracketing (AEB): This feature automatically takes a series of photos at different exposures. It's the technical heart of the HDR process, saving you from manually adjusting settings for every single shot.
Most interchangeable-lens cameras made in the last decade will have these features. A wide-angle lens, typically in the 16-24mm range on a full-frame camera, is also standard for capturing the full scope of interior spaces.
A Repeatable Camera Setup for Perfect Brackets
Consistency is your best friend when shooting a property. Developing a go-to camera setup removes guesswork and lets you work quickly and efficiently from room to room. This simple, three-part process is a reliable starting point for any interior shoot.
First, set your camera to Aperture Priority mode (A or Av). This lets you choose the aperture while the camera automatically adjusts the shutter speed for the baseline exposure. For real estate interiors, an aperture of f/8 to f/11 is the sweet spot. This range ensures everything from the foreground furniture to the background details stays tack-sharp.
Next, lock in your ISO at its lowest native setting, which is usually 100 or 200. Higher ISO values introduce digital "noise" or graininess, which degrades image quality. Since your camera is on a tripod, you can use a slower shutter speed to let in more light without worrying about camera shake, making a low ISO the perfect choice for clean, crisp images.
By setting your Aperture to f/8 and your ISO to 100, you've established a solid, high-quality foundation. The only variable the camera will adjust for your baseline shot is the shutter speed—exactly what you want for a controlled bracketing sequence.
Configuring Your Auto Exposure Bracketing (AEB)
With your aperture and ISO locked, the final step is to configure your camera's Auto Exposure Bracketing. This setting tells the camera how many photos to take and how far apart their exposures should be.
For most interior scenes, a 3-shot bracket is plenty. You'll want to set your exposure separation to +/- 2.0 EV (Exposure Value). This tells the camera to take:
- One "normal" photo at the meter's suggested shutter speed (0 EV).
- One darker photo, underexposed by 2 stops (-2 EV), to capture detail in bright windows.
- One brighter photo, overexposed by 2 stops (+2 EV), to capture detail in dark shadows.
For rooms with extreme contrast—like a dark interior with harsh sunlight blasting through a window—you may need a 5-shot bracket. In that case, you'd set the camera to take five images at -4, -2, 0, +2, and +4 EV. This wider range ensures you capture every bit of data from the absolute darkest shadows to the brightest highlights, giving your editing software everything it needs to create a flawless final image.
Mastering Bracketing and Composition in the Field
Okay, your camera's set, your tripod is solid. Now we move from the technical setup to the creative part. This is where the science of bracketing meets the art of composition to create photos that don't just show a space—they sell it. Every decision you make out in the field has a direct ripple effect on the quality of your final HDR real estate photos.
The first big call you'll make is picking the right bracketing strategy for the room you're in. Not every space has the same lighting quirks, and getting this right from the start saves a ton of headaches later.
Choosing Your Bracketing Strategy
A standard 3-shot bracket at +/- 2.0 EV is your go-to, your trusty workhorse. Honestly, this simple setup will handle about 80% of the interior spaces you encounter. Think bedrooms with normal-sized windows, well-lit hallways, or a living room on an overcast day. It’s efficient and gets you all the light information you need without clogging your memory card with extra files.
But some rooms are just dramatic. They demand more. When you walk into a space with a huge difference between the brightest and darkest spots, you have to widen your bracket. This is non-negotiable.
You'll need a 5-shot or even a 7-shot series in these high-contrast situations:
- Direct Sunlight: A room where intense sun is blasting through a window, casting deep, dark shadows in the far corners.
- Million-Dollar Views: A high-rise condo with floor-to-ceiling windows overlooking a bright city skyline or a sparkling waterfront.
- Complex Lighting: Kitchens are notorious for this—you've got bright under-cabinet LEDs, dim pendant lights, and a sunny window all in one shot.
For these tricky rooms, a 5-shot bracket (like -4, -2, 0, +2, +4 EV) is a much safer bet. This wider range guarantees you capture everything, from the glowing filament in a lightbulb to the subtle wood grain in the darkest corner. If you don't bracket wide enough here, you'll end up with "clipped" highlights (pure white) or "crushed" blacks (pure black)—that's lost data you can never get back in post-production.
Here's a good way to think about it: a 3-shot bracket is for a normal conversation. A 5-shot bracket is for a shouting match between the bright windows and the dark shadows. You need more exposures just to hear what every part of the room is saying.
The Art of Real Estate Composition
Once you've locked in your bracketing plan, it's time to compose the shot. A technically flawless HDR image can still fall flat if the composition is weak. Your job is to make rooms feel spacious, inviting, and true-to-life.
Shoot From the Corners
One of the oldest tricks in the book is still one of the best: shoot from a corner looking into the room. This diagonal line of sight just works. It naturally makes a space feel bigger and more dimensional by showing three walls, which creates a sense of depth that a straight-on shot just can't match. Don't be afraid to tuck yourself right into a corner or stand in a doorway to really maximize the effect.
Keep Your Verticals Straight
This is a dead giveaway of amateur photography. Pay close attention to the vertical lines in your frame—the edges of doors, windows, and walls. If your camera is tilted even slightly up or down, those lines will start to converge, making the room look distorted and sloppy. Use your camera's built-in level or turn on the grid display to get those verticals perfectly straight. It’s a small detail that makes a huge difference.
Lock in a Consistent Camera Height
Set your tripod and forget it. A consistent height for every shot, usually around 5 feet (or 60 inches), makes a huge difference. This is close to the average person's eye level, so it gives potential buyers a natural, immersive feeling as they click through the photos online. It avoids weird perspectives, like looking down on the furniture or staring up at the ceiling, and creates a cohesive "flow" for the virtual tour.
Finally, to make sure every single frame in your bracket is tack-sharp, take your hands off the camera when you shoot.
- Use a remote shutter release. This is the best way to completely eliminate camera shake.
- Set a 2-second timer. No remote? No problem. The timer gives the camera a couple of seconds to settle after you press the button, ensuring the first exposure is perfectly still.
Nailing these techniques in the field is what separates the pros from the rest. You're capturing the highest quality raw materials possible, which sets you up for a smooth editing process and a stunning final product.
Your Guide to Merging and Editing HDR Images
Snapping the perfect bracket of photos in the field is a great start, but the real magic of HDR photography for real estate happens on your computer. This is where you take that series of dark, medium, and bright shots and blend them into a single, stunning image that shows a property at its absolute best.
The good news? You don't need to be a Photoshop wizard to get professional results. Modern software makes merging and editing HDR images easier than ever. Let's walk through a few different ways to do it, from a simple one-click solution in Adobe Lightroom to more hands-on methods for those who want a bit more creative say.
The Lightroom Workflow: A Simple and Powerful Start
For most agents and photographers just getting started, Adobe Lightroom is the fastest and most efficient way to create beautiful HDR images. Its built-in "Photo Merge to HDR" feature is incredibly smart and does most of the heavy lifting for you.
Here's how simple it is:
- Import Your Brackets: Get all your bracketed photos from a shoot into your Lightroom catalog.
- Select a Set: Find the 3, 5, or 7 photos that make up one composition and select them all.
- Merge to HDR: Just right-click on the selected images and choose Photo Merge > HDR. A preview window will pop up with a few options.
In that preview window, you'll see a few checkboxes. Auto Align is a must—it corrects for any tiny camera movements between shots. Auto Settings gives Lightroom a first crack at balancing the tones. The Deghost option is also crucial; set it to a low or medium amount to fix any blur or "ghosting" from things that moved during the shot, like a spinning ceiling fan or leaves blowing outside a window.
Once you hit Merge, Lightroom creates a brand new DNG file—your raw HDR image—ready for the final polish.
The best part about the Lightroom workflow is that you end up with one incredibly flexible file. You can then use all the familiar sliders—Exposure, Highlights, Shadows—to fine-tune the image, but now you have far more data to work with than a single shot could ever provide.
If you want to dive deeper into those final adjustments, you can find a ton of great info on how to edit real estate photos to get that polished, professional look.
The Photoshop Workflow: For Ultimate Control
If you're the type who likes to have total control over the final image, Adobe Photoshop offers a more manual, layer-based approach. It definitely has a steeper learning curve, but this method allows you to precisely blend different parts of your exposures together, giving you the final say on every single detail.
The general idea is to open your bracketed images as separate layers in one Photoshop file. From there, you use layer masks to literally "paint" in the best parts of each exposure. For example, you can use the dark exposure to bring back the rich blue sky in a window view, then use the bright exposure to reveal details in a dark corner, all while using the mid-tone shot as your base. This is the foundation of the popular "flambient" style, though it takes more time and practice to master.
The infographic below shows the core in-field composition principles that really set you up for success, no matter which editing workflow you choose.
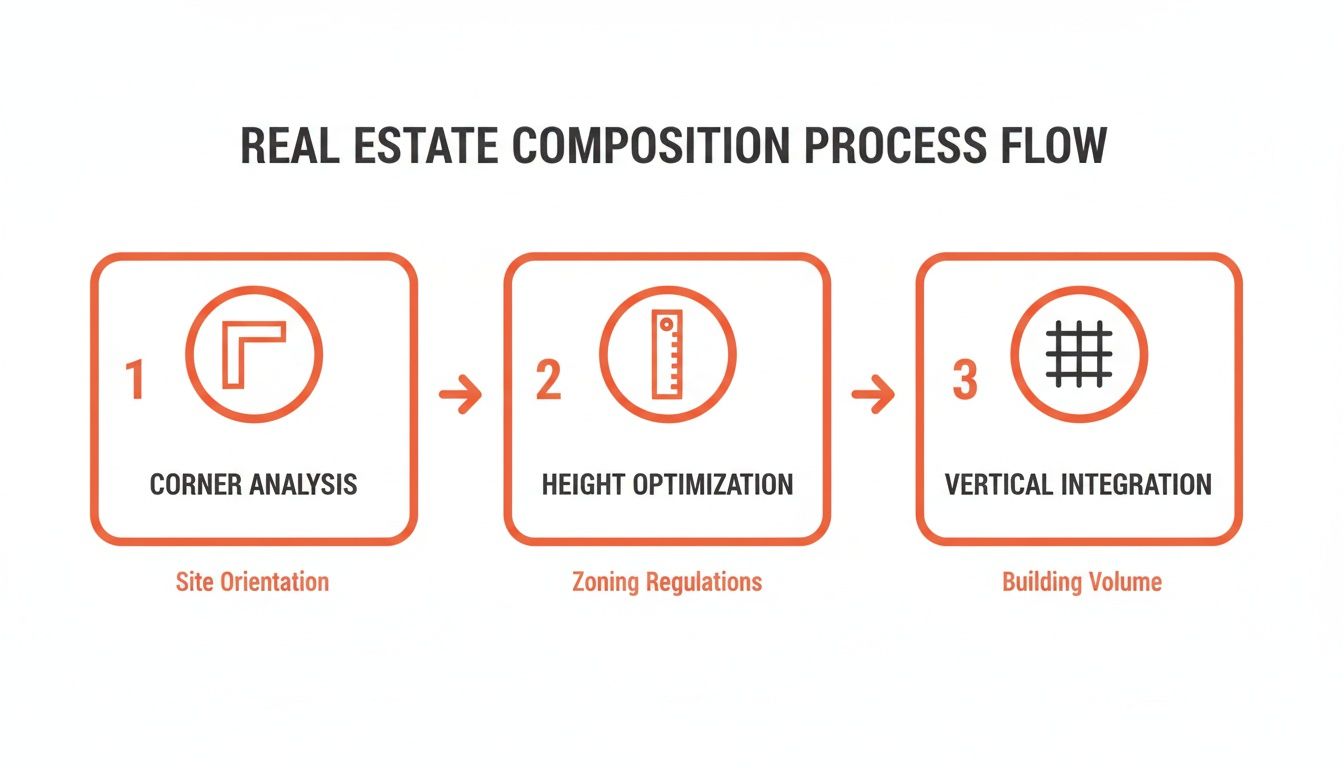
This process really drives home how shooting from corners, keeping a consistent height, and making sure your vertical lines are straight are foundational steps. Get these right, and merging your images becomes a whole lot easier.
Specialized Software and Final Touches
Beyond the Adobe world, dedicated software like Photomatix Pro has long been a favorite among seasoned real estate photographers. It offers advanced tools built specifically for merging bracketed photos, giving you deep control over tone mapping and deghosting. While its interface might feel a little dated, its singular focus on HDR processing can produce exceptionally clean and natural results.
No matter which tool you land on, the final goal is always the same: a balanced, natural image. Subtlety is everything. You're trying to expand the dynamic range, not create an over-the-top, cartoonish picture.
After merging, your final editing checklist should include:
- White Balance: Make sure the colors are true to life. A slightly warm tone usually feels more inviting.
- Contrast and Clarity: Add a little contrast to make the image pop, but go easy on the clarity and texture sliders.
- Lens Corrections: Use your software’s built-in profiles to fix any distortion from your wide-angle lens. It’s usually a one-click fix.
- Sharpening: Apply a final touch of sharpening to make the fine details crisp and clear.
Finally, once your masterpiece is ready for the web, don't skip the crucial last step. Learning how to optimize images for web performance and conversions ensures they load quickly and look fantastic on any device, turning all your hard work into a great first impression for potential buyers.
Common HDR Photography Mistakes and How to Fix Them
Even after you've nailed the bracketing and merging process, a few common pitfalls can still trip you up. The whole point of HDR photography in real estate is to create images that feel natural and inviting, not artificial or jarring. Learning to spot and fix these frequent mistakes is what separates the good photos from the truly great ones.
Ghosting: When Things Move Between Shots
One of the most common issues you'll run into is "ghosting." This happens when something moves between your bracketed exposures. Think of a ceiling fan that was left on, leaves blowing outside a window, or even a car driving by in an exterior shot.
Because the object is in a slightly different spot in each frame, the final merged image shows a blurry, transparent artifact where the movement occurred.
Most modern HDR software has a deghosting tool built right in. In Lightroom's HDR Merge window, for instance, you’ll find a simple "Deghost" checkbox with low, medium, and high settings. I always start with the low setting; it’s usually enough to fix minor movements without creating other weird artifacts. For something more stubborn, like that fast-spinning fan, you might need to bump it up to a higher setting.
Avoiding the Over-Processed "Cartoon" Look
This is probably the biggest sin in HDR photography: pushing the editing sliders way too far. It creates that infamous oversaturated, hyper-detailed, almost "cartoonish" look that just screams amateur hour. This usually happens when a photographer cranks up the clarity, texture, or saturation sliders trying to make the image "pop."
The key to a professional-looking HDR image is subtlety. Your job is to replicate what the human eye would see, not create some surreal, fantasy version of the room.
The best HDR photos don't look like HDR photos at all. They just look like perfectly exposed, natural images. If a viewer can immediately tell you used an aggressive HDR technique, you've likely gone too far.
To fix this, pull back on your edits. Instead of making dramatic global adjustments, use targeted local adjustments to gently lift shadows and tame highlights. Keep your colors realistic and make sure the whites in the room actually look white, not tinged with a weird blue or yellow cast.
Managing Digital Noise and Lens Distortion
A couple of other frequent problems can sneak into your final image: digital noise and lens distortion.
Digital noise looks like fine grain or colored speckles. It's most common in the darkest parts of your image, especially after the software has worked to digitally brighten those areas. While shooting at a low ISO helps tremendously, some noise is often inevitable.
Most editing programs have excellent noise reduction features, and a little bit goes a long way. If you find noise is a persistent problem in your low-light shots, it's worth learning more about dedicated tools and techniques. We cover this in our guide to noise reduction in images.
Finally, don’t forget about lens distortion. Wide-angle lenses are essential for capturing entire rooms, but they naturally cause straight lines to appear curved or bowed, especially near the edges of the frame. Luckily, this is incredibly easy to fix.
- Enable Lens Profile Corrections: In Lightroom or Photoshop, find the "Lens Corrections" panel and just check the box to enable profile corrections.
- Select Your Lens: The software is smart enough to detect your camera and lens automatically, applying a specific profile that instantly straightens out any warping.
This single click ensures that walls, doorways, and windows look straight and true, giving your photos a much more polished and professional feel. By actively looking for and correcting these common issues, you'll ensure every image you produce is clean, realistic, and ready to grab a buyer's attention.
Using AI When Speed and Consistency Matter
Manual HDR photography for real estate can produce some truly stunning results, but let's be real—it's a massive time suck. You're lugging a tripod around, meticulously bracketing every single shot, and then chaining yourself to a computer for hours to merge and edit everything.
For a busy agent juggling listings, clients, and closings, that's a whole day you just don't have.
This is exactly where a different way of thinking gives you a serious business edge. AI-powered platforms are completely changing the game by delivering high-quality, HDR-style images with unbelievable speed and consistency. Forget the multi-shot process. These systems start with something you're probably already doing: a simple video walkthrough of the property.
Just imagine walking through a home with your phone, capturing a quick, smooth video of each room. From that one clip, an AI engine can analyze the footage, cherry-pick the absolute best frames, and generate a full set of perfectly lit, MLS-ready photos. The entire bracketing and merging workflow is handled for you.
The Power of Automated Photo Generation
So how does it work? The technology pulls a huge amount of visual data from your video stream. It intelligently blends information from different frames to create images with a massive dynamic range, which means bright windows look crisp and clear, not blown out, while dark corners still show all the detail.
The result is a consistent, high-end look across every photo, for every property, every single time.
This approach completely removes the variables that can mess up a manual shoot. No more worrying about inconsistent editing styles between listings or that nagging feeling you missed the perfect bracket because you were in a rush. The AI handles all the technical heavy lifting, freeing you up to do what you actually do best: sell homes.
This isn't just about saving a few hours. It’s about building a marketing engine that can scale. With AI, you can have a complete photo set for a new listing in minutes, letting you get properties on the market faster than your competition.
More Than Just HDR Photos
But here's where it gets really interesting. These platforms go way beyond just creating HDR-style images. Because the AI actually understands the physical space it's looking at, it can offer a whole suite of tools that solve common real estate marketing headaches in an instant.
- AI Decluttering: Is the seller's home a little too lived-in? The AI can digitally remove clutter from the photos, presenting a clean, spacious look without anyone having to move a single box.
- Virtual Staging: For those empty, vacant properties, these tools can add stylish, realistic furniture to every room. This helps buyers visualize the home's true potential instead of just seeing blank walls.
- Instant Restyling: Some platforms even let you change wall colors, swap out flooring, or update cabinet finishes right in the photo, offering buyers a sneak peek of what a minor renovation could accomplish.
These features turn a simple photo shoot into a powerful visual marketing machine. You're moving past the limits of traditional photography and getting ahead of potential buyer objections before they even come up. For a deeper look at the tech, check out our complete guide on AI real estate photo editing.
Choosing an AI-powered solution is a strategic move to prioritize speed, consistency, and scale. While manual HDR will always have its place for high-end architectural shoots, using AI for the majority of your listings means you can market more properties, more effectively. It’s about working smarter, not harder, to bring in more buyers and close more deals.
Ready to stop spending hours on photos and start getting a full marketing kit in minutes? With Bounti Labs, a single video walkthrough generates stunning HDR-style photos, a property description, a listing website, and AI-powered tools for virtual staging and decluttering. See how it works at https://www.bounti.ai.